
When it comes to frontend frameworks, the most popular two in 2021 are React and Angular. But well, Svelte is another Javascript framework that shows an impressive rate of improvement in recent years. Soon enough Svelte will be among the most loved frontend frameworks in the developing community. So, if you are a beginner at Svelte, this is your guide on how to set up and use Svelte. Let’s see how we can use Svelte for frontend development.
Origin
By: Rich Harris
On: November 26th, 2016
Created with: TypeScript
Docs: https://svelte.dev/docs
A Bit about Svelte
Svelte JS has some similarities to Vue JS and React. It can be used in frontend development to build interactive, and fast web apps. And in this framework, at the build time, your code is converted totally into Javascript. Svelte does not use Virtual DOM and in turn, it makes this framework perform faster. If you want to know more about it, check this article.
And another plus point is, Svelte is reactive making the DOM sync with the state of the application. This may happen as a response when an event occurs. And this is a pretty much useful guide if you want to learn more about reactivity. All of these features make Svelte ideal for frontend development.
To get started with Svelte, it would be great if you are familiar with HTML, CSS, Javascript, and CMD/ Terminal. Svelte may not have much of a community compared to other popular frontend frameworks, but its lightweight and fast nature are surely increasing its popularity with time. Now let’s go ahead and see how to do this.
How to set up Svelte…
01. Creating the first app with Svelte
First, have Node installed, and then create a new folder and open it with your preferred editor. In my case, it is going to be Visual Studio Code. You can open the terminal and run the below command to download degit. It will download the latest Svelete project template from its repository.
npx degit sveltejs/template
And to install the remaining dependencies, run npm install command.
02. Let’s run the app
Now we are ready to run our Svelte app in development mode.
npm run devAnd if everything goes smoothly, you will get this message saying that your app is ready on localhost, port 5000 like this.

And here we go…

Folder Structure
That is how you can simply initiate a project with Svelte. And I’ll show you what the folder structure looks like.

main.js
import App from './App.svelte';
const app = new App({ target: document.body, props: {
name: 'world' }
});
export default app;
This is basically the content of your main.js file. It is present within the src folder of your application.
app.svelte
The top-level file we can use for editing basic components is the app.svelte file. You may find the html code and styles that make up the page visible on the localhost within this file.
Trying out several simple changes…
First I am going to change the value of the name variable within the main.js to “FOSS”. And then, I’ll change the small description to “Free and Open Source Software” and make its color violet. You can change things on your own and see how it turns out.
main.js
import App from './App.svelte';

const app = new App({
  target: document.body,
  props: {
    name: 'FOSS'
  }
});

export default app;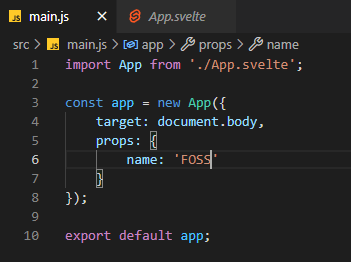
app.svelte file

This is the output after making the changes.

And Finally…
Well, I hope you got the basic idea of how to use and navigate around svelte components. You can try out this tutorial to learn more about the Svelte concepts. Happy Coding!

Good job